The Clamshell Photography Light Setup
Not every lighting set-up has to be complicated. For simple headshots, I found that the clamshell light setup works well.
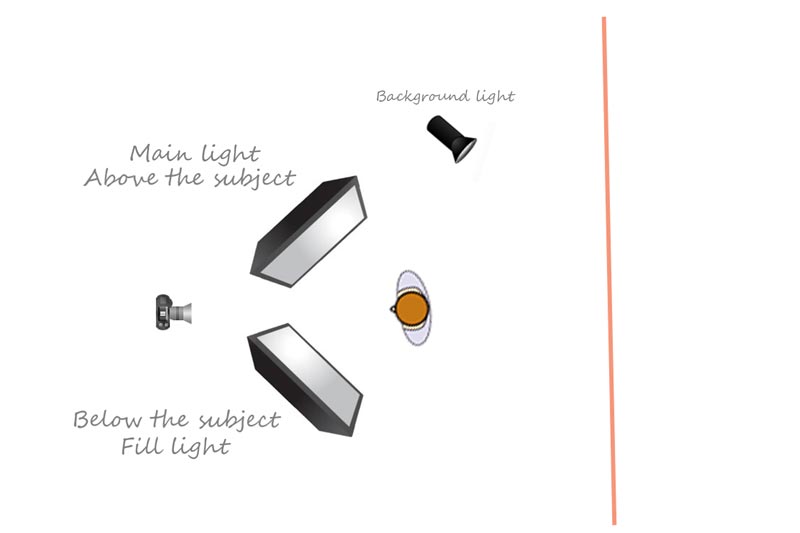
Why is it referred to as the clamshell setup? Well because when viewed from the side it resembles an open clamshell. One light is pointing down on the subject, your main light, and the other light pointing up from the bottom typically acting as a fill light. If you don’t have the second light, you can attach a reflector to a stand or have your model hold one. You can also use different modifies in your setup. In this case, I used two medium softboxes.
The positions of the lights are close to the subject, and you will want to expose from the main light. Power down the fill light as needed to get the effect you are looking for. The job of the fill light is to reduce shadows created from the main light shooting downward onto your subject. If the fill light is too powerful then it may create a funny look on your subject, if not powerful enough, the shadows may be too dark.
I used a white background and added a background light with a red gel attached to get a pinkish background. Again, this is something that can be played around with until the desired effects are achieved. Don’t set the backlight too high or it may interfere with the exposure of your subject (this may depend on how close your subject is to the background).
Camera, Equipment, and Settings
- Nikon D7100 24.1 MP DX-Format
- Alienbees B800 unit (3 of them)
- 2 Soft boxes for the clamshell
- 1 light with snoot modifier aimed at the background
- Cybersync trigger and remote
- Tokina 100mm f/2.8 PRO D Macro Lens
Camera Settings
- ISO – 100
- Shutter sync speed – 250
- F-stop – 5.6
Basic Setup Diagram

