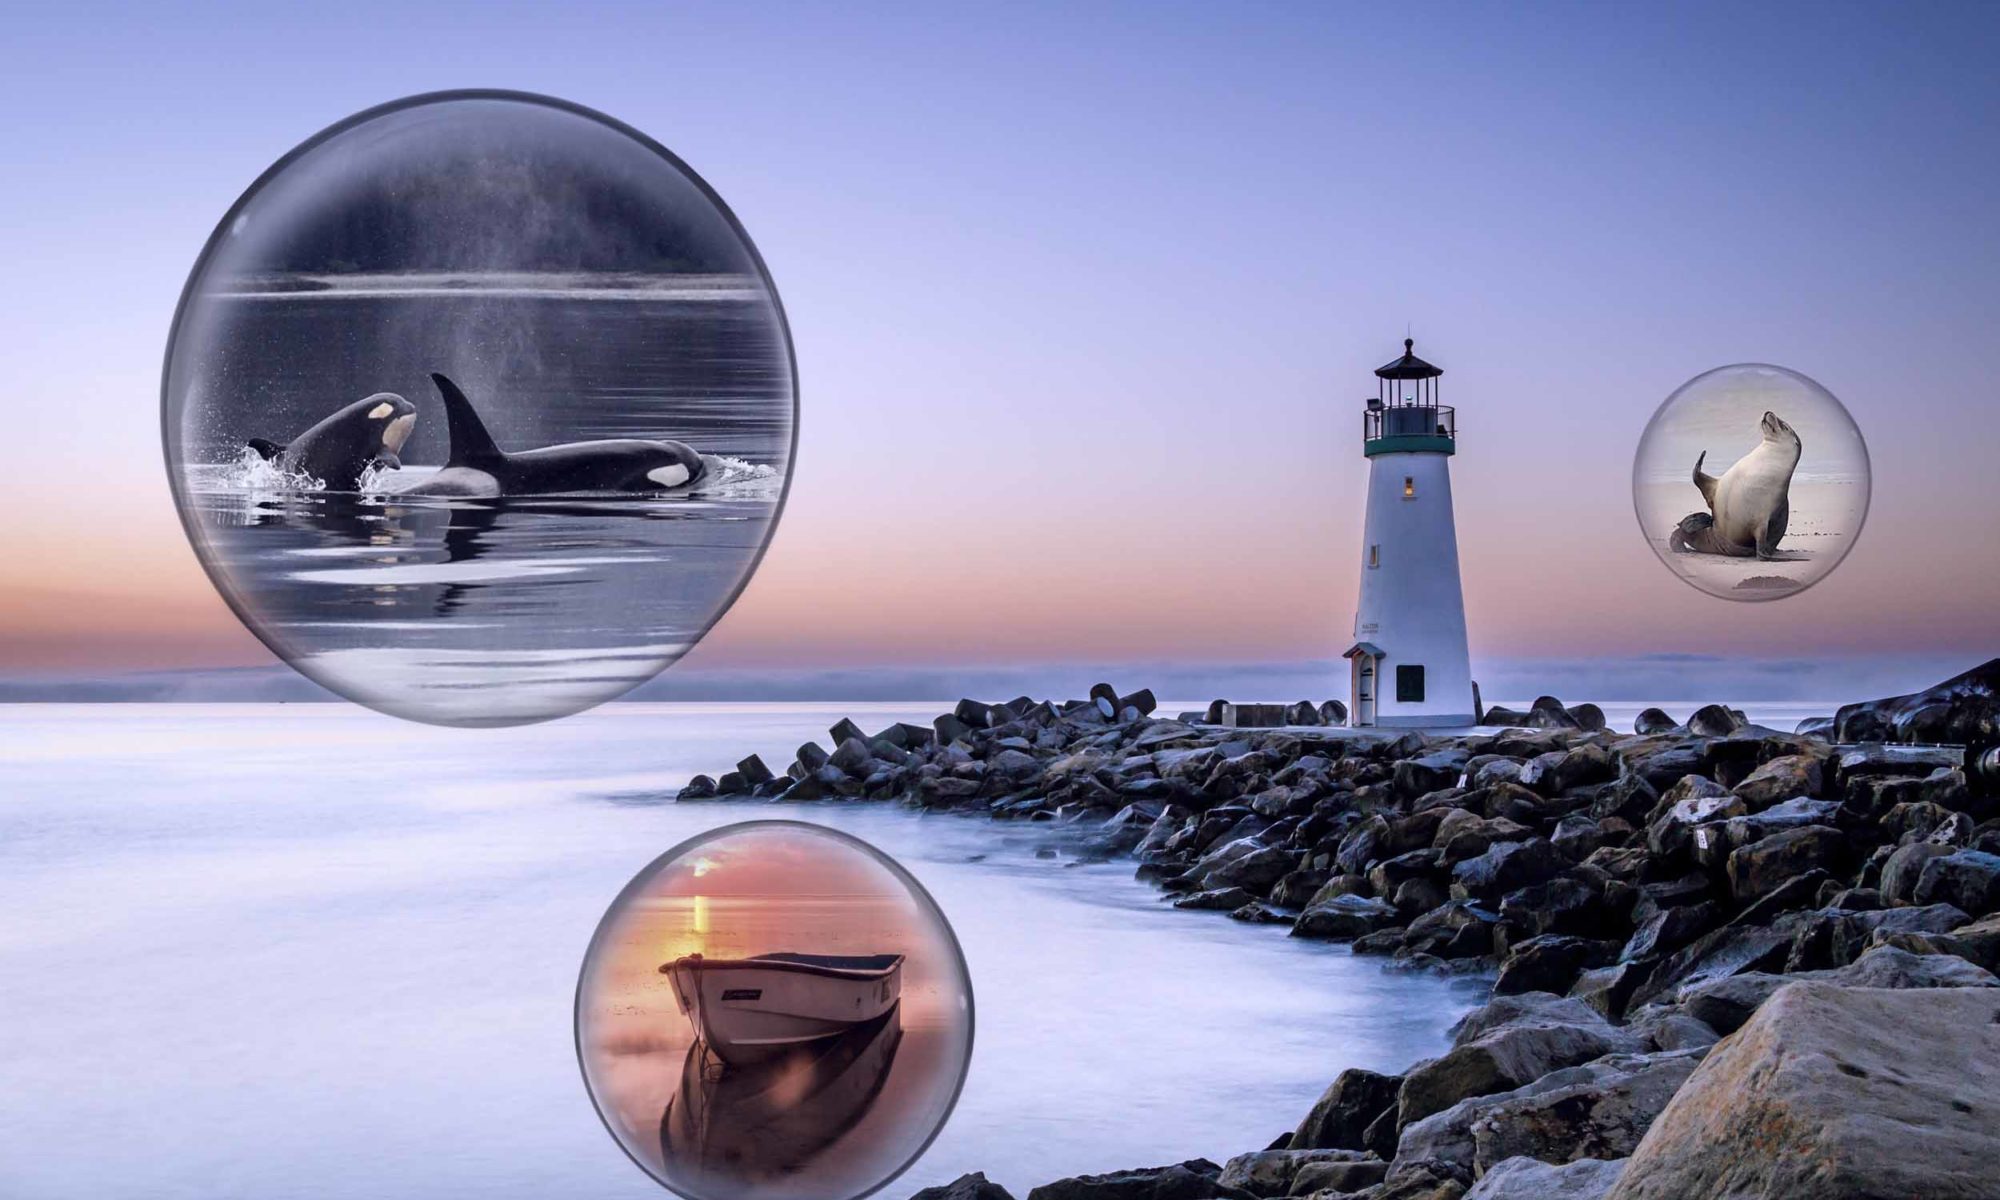
COVID-19 in 2020 has presented all sorts of challenges and changed the way society interacts. No job, can’t go out and play, and hell you can’t even get a hair cut. What’s a person to do? Create bubbles in landscapes where they totally don’t belong, of course!
Step 1: In Photoshop create a brush preset from a bubble PNG or other high-quality image of a bubble. The bubble should be in black and white so convert it if necessary and crank up the blacks a bit to get more definition in your bubble. If there is a drop shadow or any other elements in the photo, remove them as well. Once you have your bubble image the way you want it;
Click on the BRUSH Tool > Go to Edit > Select Define Brush Preset > Name your bubble brush.

As you create your bubbles you may want to change their size and rotate them so they all don’t appear the be exactly the same.

Step 2: Create a background layer or use a picture for your background layer. Here is the image I will be using.
Step 3: Create a blank layer above the background. Using your Brush Tool and the brush you created, determine your size and click in your image.

If the bubble is too dark for your liking, lower the opacity on the layer.
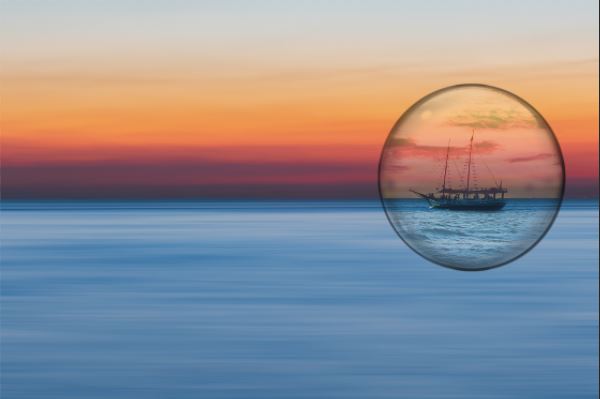
Step 4: Bring in the image you are going to use to place in your bubble. You can bring in all the images or one at a time. Drag and drop the image into your workspace. You’ll likely need to Rasterize the layer before you can make any changes to it. Get the portion of the image you are placing in the bubble about the right size to fit inside the bubble.
Step 5: This step adds a very subtle bloat effect to the image. Go to Filter > Liquify > Choose the Bloat Tool. Adjust the brush radius to the size of your bubble (close to it) and click on the portion of the image you are inserting into the bubble. You may adjust the setting or click multiple times to get the look you’re after. Click OK.
Step 6: Make sure your image is active, lower the opacity of your image and place the section over your bubble. Select the Marquee Tool, Feather option around 30px, and while holding Shift, create your selection. It doesn’t have to be perfect, we’ll use a layer mask to clean up the edges.
Next, go to SELECT > Invert > Press Backspace Key > Press Delete Key > SELECT > Deselect
Step 7: Add a layer mask to the image layer and clean up the edges with a black brush, getting rid of any overflow outside the bubble. You can also change the opacity to give it more of a subtle blending effect into the bubble. Change the opacity of the image around to see how it looks. Play with your blending options as well, Hard Light sometimes has a cool effect.
Step 8: Link the bubble layer and your image layer so later if you want to move them around they move together.
Step 9: Repeat Steps 4-8 to complete your bubble composite.
Step 10: Add some color correction to help bring it together by adding a color-averaged layer from the background, drag the layer to the top, adjust the opacity.
